I've got a bunch of pet websites, some hosted in Azure, others with an old school hosting provider. I don't think these other non-Azure sites are going to be transferred any time soon either by virtue of the fact you typically get an email server with your web hosting package, something sadly lacking from Azure.
Most of the source code for these site is in GitLab. Now, I like both Azure DevOps and GitHub but at the time these sites were created both of these cost money for private repos and despite that changing recently I don't really see a compelling argument to shift the code.
What I don't have for some of the sites (and would be useful) is to set up continuous integration and/or deployment to build, publish and deploy them.
I've split this post into two parts. This first part will describe the situation where the source code is in GitLab, the website hosted with a shared hosting provider and the deployment process itself is handled using Azure DevOps.
GitLab Setup
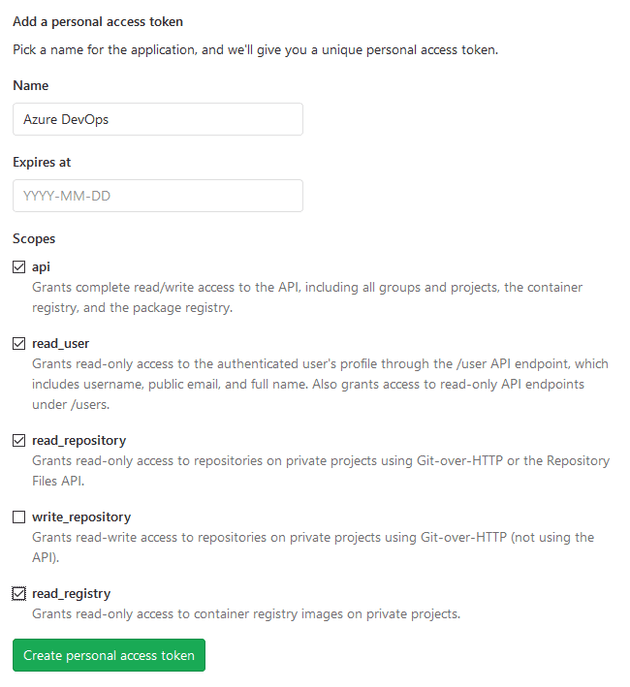
Not much to do here, all you need is an Access Token. To get one log in to your GitLab.com repo and go to your User Settings. In the left hand menu select Access Tokens.
Give the access token a name and then select the following permissions:
- api
- read_user
- read_repository
- read_registry
Click the “Create personal access token” button. It's important to take a note of the token's value here as it's NOT shown again when you come back to this page. If you do lose it then you can revoke the existing token and generate a new one.
That's all you need to do within GitLab.
Hosting Provider Setup
Depending on your hosting provider you may have a few options for deploying a website. In my case I've got the choice of Microsoft's Web Deploy or good old FTP.
I've used Web Deploy in the past and it works well when you're doing a quick and dirty deployment straight from Visual Studio to the web server. I've got the slight complication of having CloudFlare sitting in front of the website which is great for performance and also gives you the option of HTTPS for free even when your hosting provider may not support that. The reason it's complicated is that Web Deploy operates over port 8172 by default and this isn't a port that CloudFlare forwards traffic for. So traffic for, let's say, https://www.example.com would be forwarded (on port 443) butt traffic for https://www.example.com:8172/msdeploy.axd?site=example.com wouldn't.
Now it might be possible to talk nicely to your hosting provider and ask them to offer the Web Deploy service on either a different port or alternatively on a sub-domain – and then ensure that CloudFlare doesn't proxy traffic for this specific sub-domain. Neither of these were an option for me so we're left with FTP. All you need from your hosting provider are some credentials for connecting to your website via FTP.
Azure DevOps Setup
Service Connections
Now that we've got a way of connecting to both our source control provider and our hosting provider we can configure DevOps to pull the source code, build and publish, then copy the published files to the website's location.
Log in to your Azure DevOps organisation site. If you don't have one you can sign up for free. Open (or create) your project and then open the Project Settings page – the link is in the bottom left of the page at time of writing.
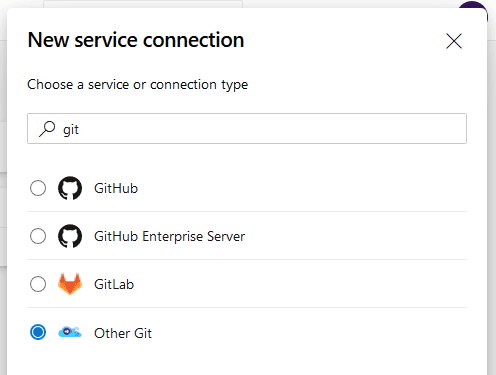
On the Service connections screen click New service connection and select Other Git.
Click Next.
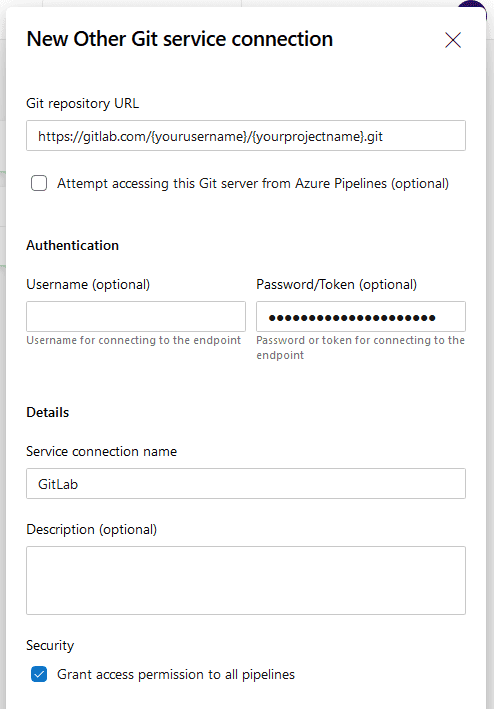
Enter the URL to your GitLab repository. In the Authentication section paste the access token you saved from earlier into the Password/Token field. The username isn't required.
Give the connection a name and Save.
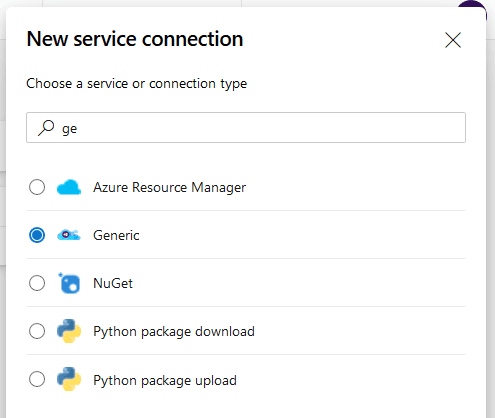
Now we want to create another connection, this time to the FTP site. Click New service connection again, this time choosing Generic.
Enter the URL of your FTP site, the credentials required to connect, give the connection a name and hit Save.
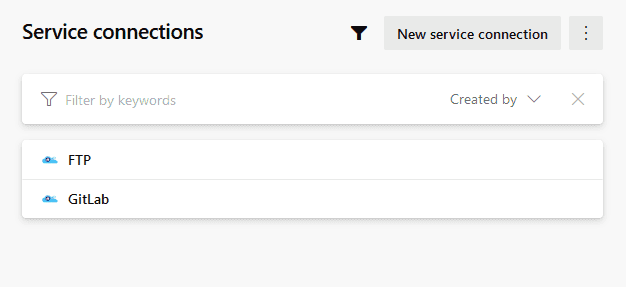
Now on your Service connections screen you should see both connections.
Now we've got our service connections configured we can set up our pipelines – one for the build/test/publish process and one for the release process.
Build Pipeline
Open your Pipelines screen in DevOps and click the New pipeline button.
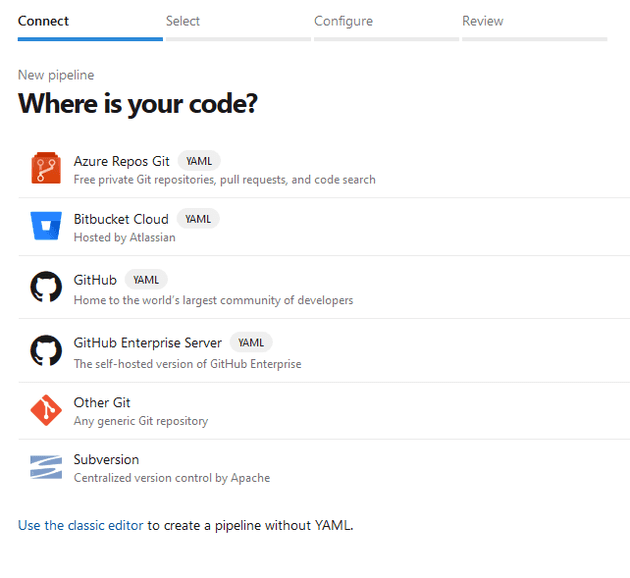
Select the Other Git option.
On the following screen the default options should be correct. The source should be Other Git and DevOps should have picked up your previously created GitLab connection. Ensure the correct branch name and click Continue.
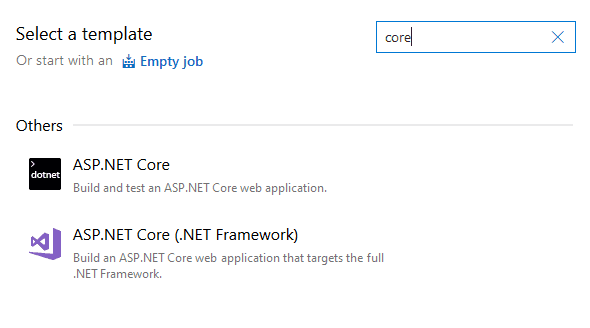
Next, we need to select the template for the pipeline. As I'm working with a .NET Core web app I'm selecting the ASP.NET Core template. Hover over your chosen template and then click the Apply button.
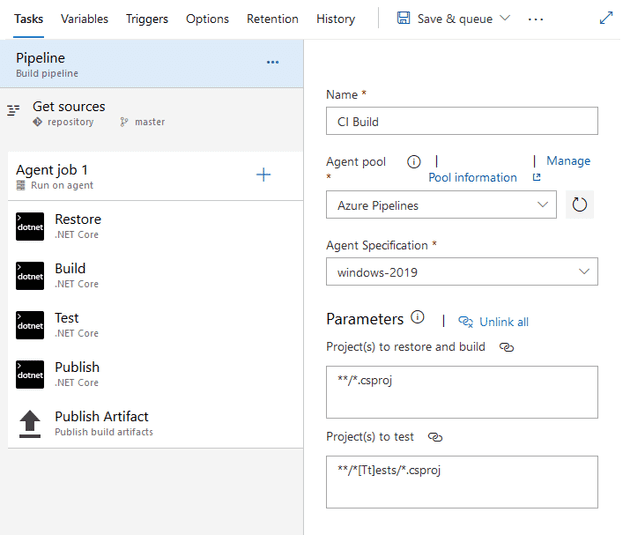
Here's what that template (at time of writing) looks like.
I've given it a name of CI Build. Feel free to configure the rest of the pipeline and job steps as necessary for your project. The default setup works just fine for this project.
The final step in the process, Publish Artifact, picks up the published files from the previous Publish step and copies them to a drop folder that we can access in the release pipeline.
Click Save & queue to save your pipeline and kick off a build.
While that's running open the Releases page in DevOps and click New release pipeline. On the template selection screen click the Empty job link at the top.
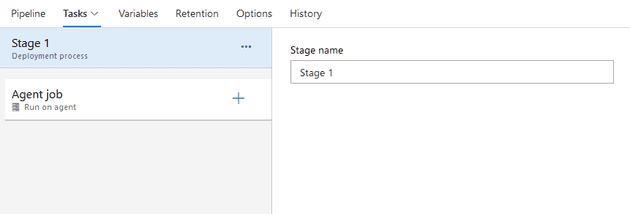
In the resulting screen you can change the name of the stage if you wish. Stage 1 works for me though.
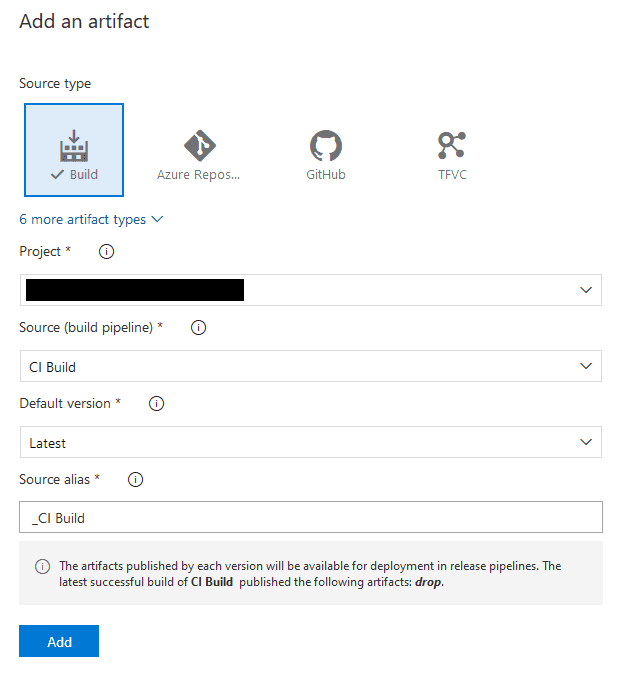
On the canvas click the + Add link next to Artifacts.
Your project should be pre-selected. Choose the build pipeline we've just created and feel free to change the source alias.
Click the Add button.
Now back on the canvas, hover over the click the "1 job, 0 task" link under Stage 1.
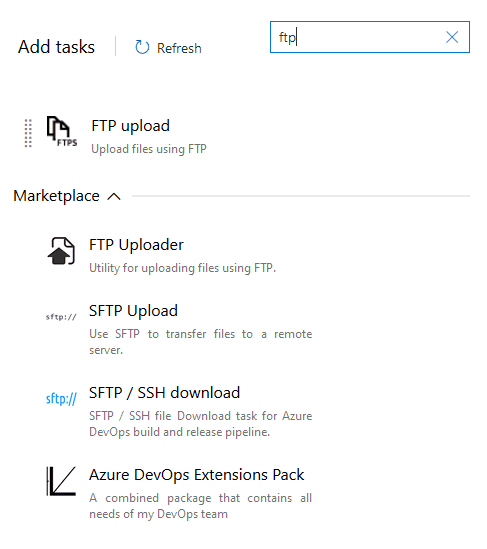
On the stage screen click the + button in the Agent job box.
Find the FTP Upload task and click the Add button to add to the stage tasks.
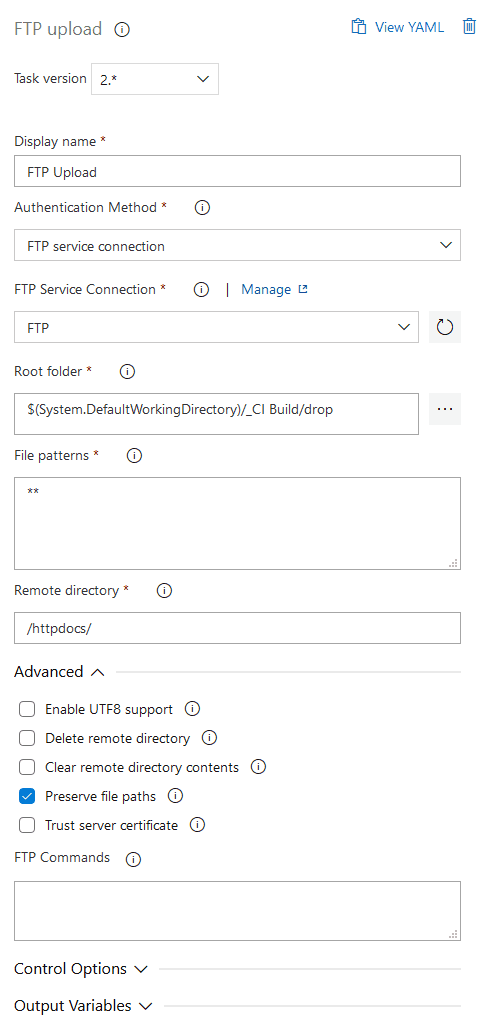
The task will be added to the list – click on it to configure.
There's a few things to set here:
- The name if you want to change it.
- Select the FTP service connection created earlier in the FTP Server Connection drop down.
- The Root Folder should be set to the drop folder or a folder within that contains the files you want to copy to the FTP site.
- Update the File patterns if necessary – I'm just copying everything.
- Update the Remote directory if your deploying into a sub-folder on the FTP site.
- Set the advanced options as required – I've set Preserve file paths as otherwise the folder structure gets flattened on copying.
Once your happy with the settings click the Save button in the top toolbar, choosing the folder where you want to save it (default root folder works in most cases) and a comment.
Now that you've done that you can perform the deployment by clicking the Create release button in the toolbar and then the Create button in the resulting popup.
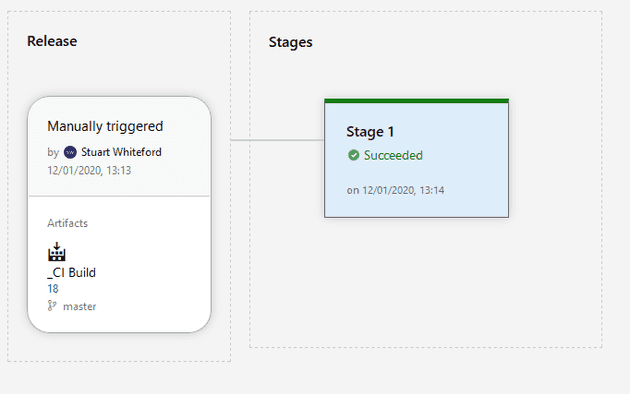
You can click the Release-1 link at the top or navigate in back through the Releases screen to view the progress.
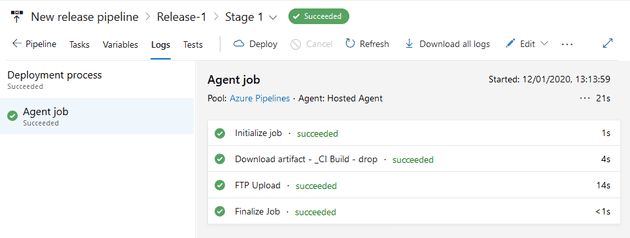
To view logs of the full process, click on the Succeeded link in the Stage 1 box.
Job done!
You've successfully pulled your source code from GitLab into Azure DevOps, built and published it then copied the published site to your FTP server.
Now given that this is just plain old FTP there's a chance that if the site has a fair amount of traffic some of the files might be in use and therefore the upload may fail. There's probably a few ways to get round this. Depending on your hosting company you may be able to connect to an API to take the site offline. Alternatively you could have a multi-stage release pipeline that uploads the app_offline.html file to the server first, then performs the copy and finally deleted the app_offline.html file.
I've not tried any of these approaches – I've only seen errors a couple of times so far and I'm happy enough to re-deploy manually when I get the email from Azure DevOps telling me the pipeline has failed.
In Part 2 I plan to do something similar where the source code is also in GitLab but I make use of the GitLab.com CI/CD pipelines to build and subsequently deploy to an Azure App Service.
